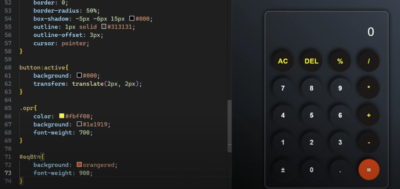
In this beginner-friendly tutorial, we will embark on the journey of creating a simple yet versatile JavaScript calculator. Whether you’re a budding programmer or just curious about how calculators work, this guide will provide you with a clear roadmap. By the end, you’ll have your calculator capable of handling addition, subtraction, multiplication, and division.
Before we dive into the technical details, let’s explore why building a JavaScript calculator is a rewarding endeavor. Such calculators can serve various practical purposes in our daily lives, such as calculating shopping bills, loan payments, or performing simple mathematical calculations. By crafting your calculator, you gain insight into fundamental programming concepts and empower yourself with a useful tool.
Prerequisites
Before we begin, you’ll need a basic understanding of the following technologies:
- HTML;
- CSS;
- JavaScript.
These are the building blocks of web development, and familiarity with them will be crucial as we progress through the tutorial.
Creating the Calculator: Step by Step
HTML – Setting Up the Structure
Our first step is to create the basic structure of the calculator using HTML. We’ll start by designing a container and adding elements for input and output.
<div class="container">
  <div class="calculator">
    <div class="output">
      <pre id="upper"></pre>
      <pre id="lower">0</pre>
    </div>
    <div class="input">
      <!-- Buttons for various operations -->
    </div>
  </div>
</div>
Here, we’ve created a container with an output section for displaying the expression and result, as well as an input section for buttons. We’re using the `<pre>` tag to ensure proper formatting.
CSS – Adding Style
To make our calculator visually appealing, we’ll use CSS to style it. The CSS code will define the colors, layout, and appearance of the calculator.
/* Calculator CSS */
@import url('https://fonts.googleapis.com/css2?family=Orbitron&display=swap');

body {
  margin: 0;
  box-sizing: border-box;
}

.container {
  display: flex;
  justify-content: center;
  align-items: center;
  height: 100vh;
  background-color: #4e4e4e;
}

.calculator {
  background: #dd6f6f;
  border-radius: 5px;
  padding: 5px;
  width: 300px;
  min-width: 300px;
  box-shadow: inset 2px 2px 5px rgba(255, 255, 255, 0.4),
                    4px 4px 10px rgba(0, 0, 0, 0.7);
}

.output {
  display: flex;
  flex-direction: column;
  align-items: flex-end;
  position: relative;
  background: #ffffff;
  min-height: 50px;
  padding: 5px;
  margin: 0 1px 10px;
  border-radius: 0.25rem;
  box-shadow: inset 1px 1px 5px rgba(0, 0, 0, 0.5);
}

.output pre {
  text-align: right;
  font-size: 25px;
  margin: 0;
  font-family: 'Orbitron', sans-serif;
  width: 288px;
  overflow-x: auto;
  -ms-overflow-style: none;
  scrollbar-width: none;
}

.output pre::-webkit-scrollbar {
  display: none;
}

.output #upper {
  color: #424242;
  font-size: 18px;
}

.input {
  display: flex;
  flex-wrap: wrap;
  justify-content: space-between;
}

.input button {
  width: calc(25% - 24px);
  height: 50px;
  margin: 8px 12px;
  border-radius: 50%;
  background-color: #c05d5d;
  box-shadow: inset 1px 1px 2px rgba(255, 255, 255, 0.3),
                    1px 1px 5px rgba(94, 31, 31, 0.7);
  color: white;
  font-size: 20px;
  font-weight: bold;
  cursor: pointer;
  outline: none;
  border: none;
}

.input button:hover {
  background-color: #b35555;
}

.input button:active {
  box-shadow: inset 1px 1px 5px rgba(94, 31, 31, 0.7),
              inset -1px -1px 2px rgba(255, 255, 255, 0.3);
  color: #642929;
}
JavaScript – Adding Functionality
The heart of our calculator lies in its JavaScript code. We’ll create functions for handling number input, operators, clearing, and calculating results. Here’s an overview of the key functions:
- pressNum(e): Handles number input, allowing users to build expressions;
- pressOperator(e): Manages operators, ensuring valid expressions;
- pressAllClear(): Clears the entire calculator;
- pressClear(): Removes the last character from the input;
- pressEqual(): Calculates the result and displays it;
- pressDot(): Adds decimal points to numbers;
- pressBracket(e): Includes brackets in expressions.
This code provides the functionality for basic arithmetic operations (addition, subtraction, multiplication, division), as well as clearing the input and calculating results.
// JavaScript Calculator

// Select the output elements
// upper output is for showing the expression
let outputUpper = document.querySelector('#upper');
// lower output is for showing the result
let outputLower = document.querySelector('#lower');

// function to get number input
function pressNum(e) {
  if (outputLower.innerHTML === '0') {
    outputLower.innerHTML = e.innerHTML;
  } else {
    outputLower.innerHTML += e.innerHTML;
  }
}

// clear all
function pressAllClear() {
  outputUpper.innerHTML = '';
  outputLower.innerHTML = '0';
}

// clear one
function pressClear() {
  outputLower.innerHTML = outputLower.innerHTML.slice(0, -1);
}

// calculate button
function pressEqual() {
  let exp = outputLower.innerHTML;
  outputUpper.innerHTML = exp;
  exp = exp.replace(/×/g, '*').replace(/÷/g, '/');
  let result;
  try {
    result = eval(exp);
    // if decimal number more than 4 decimal places
    if (result.toString().indexOf('.') !== -1) {
      result = result.toFixed(4);
    }
  } catch (e) {
    result = 'Error';
  }
  outputLower.innerHTML = result;
}

function pressOperator(e) {
  // check last operator
  let lastOperator = outputLower.innerHTML.slice(-1);
  if (lastOperator.includes('+', '-', '×', '÷')) {
    outputLower.innerHTML = outputLower.innerHTML.slice(0, -1) + e.innerHTML;
  } else {
    outputLower.innerHTML += e.innerHTML;
  }
}

function pressDot() {
  outputLower.innerHTML += '.';
}

function pressBracket(e) {
  outputLower.innerHTML += e.innerHTML;
}

// add event listeners for keyboard buttons
document.addEventListener('keydown', function (e) {
  switch (e.key) {
    case '0':
      pressNum(document.querySelector('button:nth-child(2)'));
      break;
    case '1':
      pressNum(document.querySelector('button:nth-child(5)'));
      break;
    case '2':
      pressNum(document.querySelector('button:nth-child(6)'));
      break;
    case '3':
      pressNum(document.querySelector('button:nth-child(7)'));
      break;
    case '4':
      pressNum(document.querySelector('button:nth-child(9)'));
      break;
    case '5':
      pressNum(document.querySelector('button:nth-child(10)'));
      break;
    case '6':
      pressNum(document.querySelector('button:nth-child(11)'));
      break;
    case '7':
      pressNum(document.querySelector('button:nth-child(13)'));
      break;
    case '8':
      pressNum(document.querySelector('button:nth-child(14)'));
      break;
    case '9':
      pressNum(document.querySelector('button:nth-child(15)'));
      break;
    case '+':
      pressOperator(document.querySelector('button:nth-child(4)'));
      break;
    case '-':
      pressOperator(document.querySelector('button:nth-child(8)'));
      break;
    case '*':
      pressOperator(document.querySelector('button:nth-child(12)'));
      break;
    case '/':
      pressOperator(document.querySelector('button:nth-child(16)'));
      break;
    case '.':
      pressDot();
      break;
    case '(':
      pressBracket(document.querySelector('button:nth-child(18)'));
      break;
    case ')':
      pressBracket(document.querySelector('button:nth-child(19)'));
      break;
    case 'Enter':
      // prevent default action
      e.preventDefault();
      pressEqual();
      break;
    case 'Backspace':
      pressClear();
      break;
    case 'Escape':
      pressAllClear();
      break;
  }
});
You can use this JavaScript code in conjunction with the HTML and CSS code from the previous responses to create a fully functional and styled calculator web application.
Keyboard Event Listeners
To enhance user experience, we’ll add event listeners for keyboard input. This means users can operate the calculator with their keyboard in addition to clicking buttons.
Expanding Your Calculator’s Capabilities
Now that you have a basic JavaScript calculator up and running, the possibilities for improvement and expansion are endless. Here are a few ideas to take your calculator to the next level:
- Scientific Functions. Enhance your calculator by adding scientific functions like square root, trigonometric functions (sin, cos, tan), logarithms, and exponentiation. These features can be incredibly useful for students, scientists, or engineers;
- Memory Functions. Implement memory storage and recall functionality. Users can store intermediate results and retrieve them when needed, making complex calculations more manageable;
- Unit Conversion. Incorporate unit conversion capabilities. Allow users to convert between different units, such as length, weight, volume, and more. This can be particularly handy for practical applications;
- Responsive Design. Optimize your calculator’s design for different devices and screen sizes. Make it responsive, so it works seamlessly on both desktop and mobile platforms. Responsive design ensures a consistent user experience;
- Error Handling. Improve error handling by providing clear and informative error messages. This makes it easier for users to understand and correct input mistakes;
- History Tracking. Implement a history feature that records previous calculations. Users can review and reuse past calculations, saving time and effort;
- Keyboard Shortcuts. Expand keyboard support with additional shortcuts for advanced users. Consider adding keyboard shortcuts for common functions, such as memory storage or toggling between degrees and radians for trigonometric calculations;
- Unit Testing. Consider adding unit tests to ensure the reliability and accuracy of your calculator’s calculations. Testing helps identify and fix potential bugs and issues;
- Localization. If your calculator has a global audience, consider adding localization support. Allow users to switch between different languages and number formats;
- Integration. Integrate your calculator into other web applications or projects. For example, you could embed it in an educational website, finance app, or engineering tool.
Sharing Your Calculator
Once you’ve enhanced your calculator’s functionality, consider sharing it with others. You can host it on a personal website, share it on coding platforms, or even create a dedicated project page on GitHub. Sharing your work allows you to receive feedback, collaborate with others, and contribute to the open-source community.
Learning Opportunities
Building and expanding your JavaScript calculator is a fantastic learning opportunity. Along the way, you’ll gain valuable insights into web development, programming logic, and user interface design. It’s also a fun and practical project that you can showcase in your portfolio.
Remember that programming is a continuous journey of exploration and improvement. As you continue to develop your calculator and other projects, you’ll discover new techniques, libraries, and ideas that can elevate your skills to new heights.
Creating a JavaScript calculator is just the beginning. With dedication and creativity, you can transform it into a versatile tool that serves both practical and educational purposes. So, keep coding, keep learning, and keep building amazing things!
If you’re looking for more coding challenges or projects, explore the vast world of web development, and who knows—you might be the creator of the next groundbreaking web application!


